
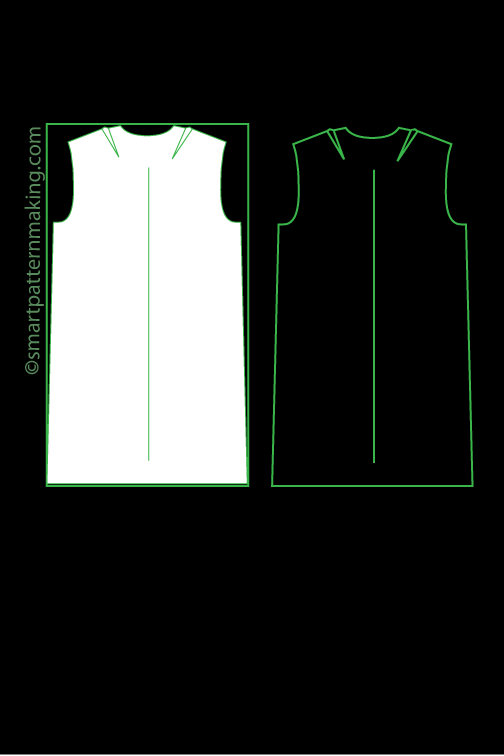
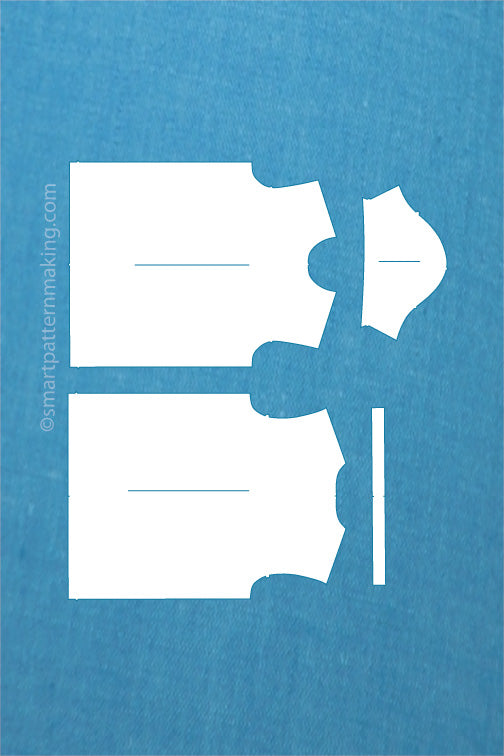
What is a Marker?
A markers is a blueprint containing all your design pattern pieces and used in the cutting process to maximize fabric consumption. Having a marker made for each design you need to cut will save you hundreds of dollars in fabric wastage and will allow you to know exactly how many yards of fabric you need to buy to cut for example 100 pair of jeans.

Before we talk about how to calculate marker efficiency let’s just talk about some of the contributors of factors that may affect our marker efficiency when creating a marker.
• To start, marker making efficiency
Marker efficiency will be greatly affected by the knowledge and experience of manual marker making and computerized marker making knowledge that he or she might have when creating a marker for a particular product or design.
• Marker making method
Marker efficiency will be higher for computerized marker making method than obtained in manual method. But if the marker maker is highly experienced, then manual marker making method may be a good efficient way to make a marker as well. Keep in mind that manual marker making has many limitations including: Not being able to mass produce markers in a fast pace environment the same way a CAD marker making system can, Not been able to store markers in a computer file for future reprints etc…
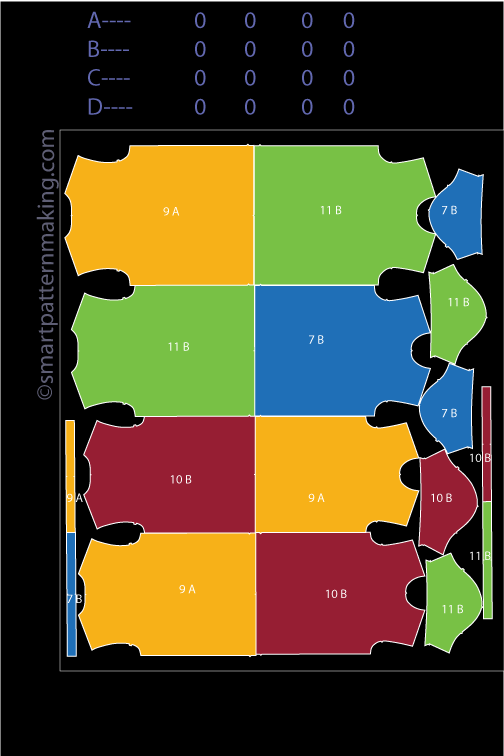
• How many times same size pattern pieces are layout on a marker e.g. (2 Small) (3 Medium) (2 Large), (2 Extra Large)
The more sizes are marked on a marker the more effective our marker efficiency will be.
• 1 way marker making VS 2 way marker making
Creating a marker for certain fabric types as velvet, corduroys and any other one way fabric types will reduce marker efficiency versus a 2 way marker where pattern pieces are lay out on opposite directions without affecting the appearance of a garment or seen any visible shading.
• Engineered marker making
Marker efficiency can also be reduce if the fabric is asymmetric then the marker efficiency will be less. If the fabric is cheeked or stripped then marker efficiency will be obtained less.
• Pattern Length and Style
If a style or design has large pattern pieces and less small pattern pieces you will have less marker efficiency. Same scenario is true if your design has only small pattern pieces and you do not have large pattern pieces to cover for empty spaces on your marker. A combination of large and small pieces would be ideal to cover those blank spaces on your marker and to render a better marker yield.

How to Calculate Total Marker Area?
The total marker area is calculated by multiplying the marker length by the marker width.
Total Marker Area = Marker Length (LN) × Marker Width (WI)
Example Calculation:
- Marker Length (LN): 14 yards 17 inches (convert to inches: 14 × 36 + 17 = 521 inches)
- Marker Width (WI): 56 inches
- Calculate: Multiply the length by the width to get the total marker area.
Total Marker Area = 521 inches × 56 inches = 29,176 square inches (or 793.52 square yards)
This formula helps determine the fabric area needed for production, ensuring accurate material usage.

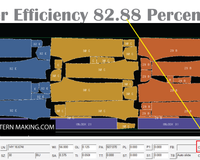
How To Calculate Marker Efficiency Percentage?
Marker efficiency is calculated using the following formula:
Marker Efficiency = (Area of all pattern pieces / Total area of the marker) × 100
Here's how to calculate it in 3 simple steps:
- Step 1: Calculate the total area of all pattern pieces. For example, if the total area is 1500 square inches.
- Step 2: Calculate the total area of the marker by multiplying the marker length by its width. For instance, 30" × 60" = 1800 square inches.
- Step 3: Divide the total area of the pattern pieces by the total area of the marker and multiply by 100 to get the efficiency percentage.
Marker Efficiency = (1500 / 1800) × 100 = 83.333%
Understanding marker efficiency helps optimize fabric usage, saving costs in production. CAD systems often automate this process for greater accuracy.
How to calculate the marker length if one square meter pattern board weight is 310 gram/m2, weight of all pattern components are 395 gram, fabric width 150 cm, marker efficiency 66%.
Calculation of Marker Length
To calculate the marker length, use the following formula:
Marker Length (m) = Weight of All Pattern Components
                   --------------------------------------------
                   Fabric Weight per Square Meter x Fabric Width (m) x Marker Efficiency
Given the data:
- Weight of All Pattern Components: 395 grams
- Fabric Weight per Square Meter: 310 grams/m²
- Fabric Width: 150 cm (which is 1.5 meters)
- Marker Efficiency: 66% (or 0.66 in decimal form)
Plug the values into the formula:
Marker Length (m) = 395 grams
                   --------------------------
                   310 grams/m² x 1.5 meters x 0.66

Marker Length (m) = 395 / 306.9
Marker Length (m) ≈ 1.29 meters
So, the marker length is approximately 1.29 meters.
------------------------
Ready to take your sustainable fashion ideas to the next level?
Design your custom patterns, transform them into digital files, resize them for the perfect fit, convert to DXF format, and produce your prints effortlessly! Let us help you create eco-friendly garments that look great and respect the planet—get started with us today!
Loved reading this article and found it valuable? If so, show us some love and buy us a coffee! ☕ :)
Developing tools and creating valuable content requires countless hours of work and extensive research—ensuring you have them at your disposal. Additionally, keeping this site ad-free and covering operational expenses demands significant resources.
If our work helps you, please consider supporting us. Your donation allows us to continue providing more valuable tools, fresh content, and the top-notch services you deserve.
Thank you so much for your support!
-------------------


5 comments
Alejandro Esparza
Hi Utsash Sarker,
Please see my answer to your question in article above.
-—————————————-
How to calculate the marker length if one square mater pattern board weight is 310 gram/m2, weight of all pattern components are 395 gram, fabric width 150 cm, marker efficiency 66%.
-——————————————-
Utsash Sarker
How to calculate the marker length if one square mater pattern board weight is 310 gram/m2, weight of all pattern components are 395 gram, fabric width 150 cm, marker efficiency 66%.
Hailu Rekiso
Wow! I Apperciate you. And I want to know weather can I ask you online or not?
Alejandro Esparza
Hello Huzaifa,
Please see my reply below to
QUESTION:(How we calculate the area of pattern pieces manually?)
ANSWER:
To calculate the area of pattern pieces when making a m arker manually same principle applys as “How To Calculate Marker Efficiency” blue diagram above on this article.
1). First, you need to calculate the pattern area covered in your marker by each pattern piece.
2). For simplicity purporses Let just say you have 4 rectangle pieces.
3). Multiply height x width of each rectangle.
4). Let’s say the dimensions of 2 of your rectangles is (20" in height x 15" in width).
5). By multiplying each rectangle height by width (20″ × 15″) we get a pattern piece area of 300 for each rectangle.
6). Let’s say now, that the dimensions of your other 2 rectangles are (10" in height x 30" in width).
7). By multiplying each rectangle height by width (10″ × 30″)we get a pattern piece area of 300
8) Now, Lets add up all pattern pieces areas
9). since we got a result of 300 for each pattern piece our total pattern piece area used in a marker should be [300 × 4]= 1200" pattern piece area used on a marker.
Hope this helps anyone trying to calculate patter piece area when creating a marker by hand. Computer marker making systems do a much better job at calculating pattern piece area on any marker you make for any of your designs.
PS. Comment below if you have a different or better way to calculate
pattern piece area manually.
Huzaifa
How we calculate the area of pattern pieces manually ?